I have been getting more into Android testing lately, especially for a core library that we use within our team that may be shared across projects and may have different developers modifying it to suit there own needs. Not making sure that every commit doesn’t break the code for someone is a recipe for trouble (and I have been there). To avoid that as much as we can, last week I set up an continuous build environment that can run tests against the core library on every commit.
The parts:
- AWS: There are a bunch of advantages of using AWS, but the biggest advantage is the availability of preconfigured stacks called AMIs that can be deployed immediately on an EC2 instance.
- Jenkins: Jenkins is a pretty popular continuous integration server. Jenkins is deployed as a Java War Its used at other parts of the company too so I can seek help if I get into trouble.
- Github: Github is a very popular code hosting service. We have been using it for a bit and its been very convenient for code that needs to be shared or open sourced.
Steps:
- Select the Bitnami AMI from the AWS marketplace and deploy it on a new EC2 instance
- The AMI creates a couple of users on the server: A default “bitnami” user and another “tomcat” user thats actually starts up a Tomcat server thats has the Jenkins app deployed.
- The Bitnami AMI has also created a user named “user” with password “bitnami” that you can use to log in to Jenkins. You can at this point decide how you want new users to be added to the system and who has access permissions.
- If the deploy works, you should be able to go to the root of your server and see a link to the running instance.
- On the left nav, click on Configure link to set up global configuration for your install
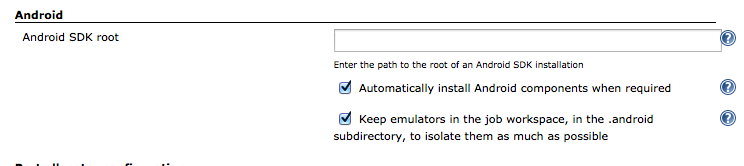
- Click on plugins and make sure to install / update the Git plugin and the Android plugin
- Under Manage Jenkins > Configure System
- Make sure Ant is set up to download if needed
- For Android make sure “Automatically install Android if needed” is checked

- Create a new Job and choose “Build a free-style software project”
- In the configure tab, under the Source Code Management section, choose Git and paste the Github URL for the project.
- Note this part is a little buggy. The problem that took me way too long to realize is that the Tomcat user doesn’t have Github.com in its list of known hosts. Follow the steps here to fix that.
- On the server, as the Tomcat user, create your ssh keys that you will use to authenticate your pull requests with Github. See Github’s guide for doing that here
- Add the public key in the account for an authorized Github user (May not be a bad idea to create a new Github user just for build purposes)
- Log in to your Jenkins account on the web again and in add your private key against the user account in the user settings section. Conveniently, Jenkins can read ssh keys from the running server but you may need to enable that.
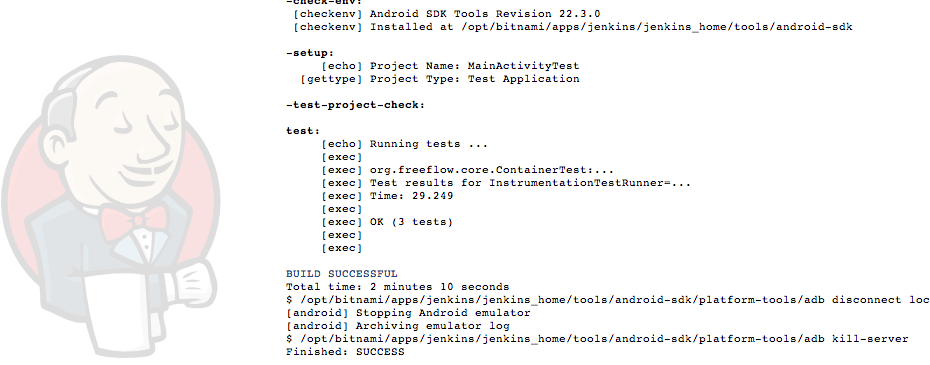
- At this point the system is pretty set up. Now make sure your Android project is set up for testing by following the guide on the Android Developers site. At the end you should have 2 projects: Your main application and a test application. Both will have Ant based
build.xmlfiles that you will have Ant on Jenkins run. Commit your projects to Github. - You can point to the
build.xml
file you want to execute. If there is abuild.xml
at the root of the project that’ll be executed by default. - You should now be able to build your project explicitly at least. Go to your “Job” and click build now.
- You can then set up automatic builds by going into your project settings on Github and go to > Service Hooks > Jenkins (Git Plugin) and pointing it to your server url.
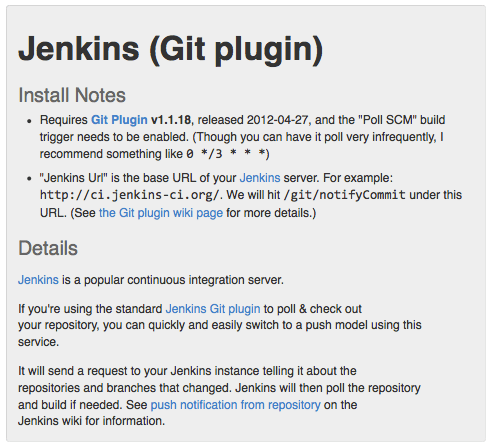

Thats it. Now every time a developer pushes to Github, Github will notify Jenkins, which will pull your repo and run the appropriate build file.