

For the last 8 months, I have been working on VR prototypes for Comcast, one of which we showed off recently at the Cable Show and have been talking about at different conferences (you can see the deck here).
We recently started adding some new faces to my team and so I figured it might be a good idea to put down a quick how-to on GearVR apps. A lot of it can be found at different links on the internet, but this might be useful to go from zero to a quick “Hello World” app using Unity.
1. Setting Up GearVR for Android build:
Since VR apps for the GearVR are Android apps, the standard Android setup for development is required:
- Go to the Settings app on your Samsung phone and go to
About Phonesettings. - Tap the “Build Number” item on the list repeatedly till you see a “You are now a developer” message
- Now in the main Settings list, you’ll see a
Developer optionsmenu item - Tap on it and in the list that comes up, turn on `USB debugging` toggle button.
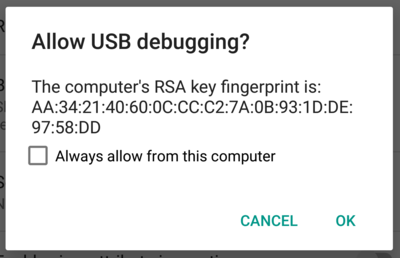
- Connect your phone to your laptop and an alert will appear asking you if you’d like to allow the PC to debug your app. Tap yes.
2. Create a Unity app
- Install the latest version of the Unity IDE including the Android plugin.
- Create a quick new project (just put a cube in front of the camera so that you have something to see when the app launches)
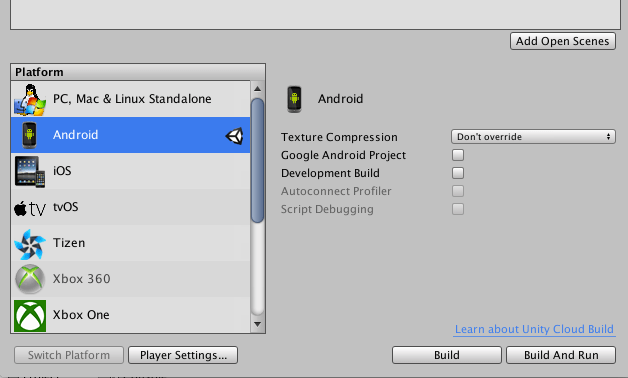
- From the Unity IDE toolbar, click on
File -> Build Settings - Unity probably defaulted you to a Mac/Windows app export. From the platform list, click on Android and then click on Switch Platform. This might take a couple of minutes as Unity converts the project.
- When done, tap on the
Player Settings. In the settings that appear, tap on the Android tab, and in theOther Settings, select theVirtual Reality Supportedoption and enable the Oculus option.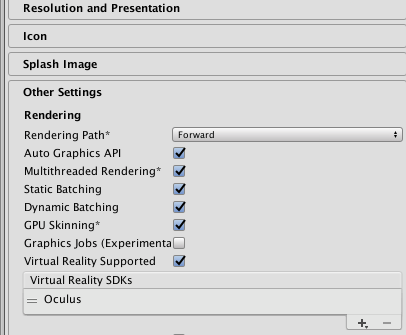
3. Enable your Android device to run Oculus apps on device.
- Create a profile at developer.oculus.com
- Connect your phone to your computer and use the
adb devicescommand on the command line to detect the connected device. Copy the device id. - Use the device id at the Oculus osig file generator. Paste the id in the form field and you’ll get an osig file.
- Save the osig file in your project in the
Project > Plugins > Assetsfolder. This will allow Unity to package the file into the generated apk
4. Build and Run
- Click the
Build and Runitem in the Unity toolbar. Unity will pack and deploy the app to your phone. - You’ll probably get an alert saying “The app cannot be launched because there is no Launcher Activity in the app. But the app will be deployed to the device.
- Back on the phone, go to Settings > Application Manager and find an app called “Gear VR Service”. Select it.
- Tap
Storageand thenManage Storage - Tap the
VR Service Versionlabel multiple times till you get a notification saying “You are now a developer”. Two other options will appear below:Developer ModeandAdd Icon to app list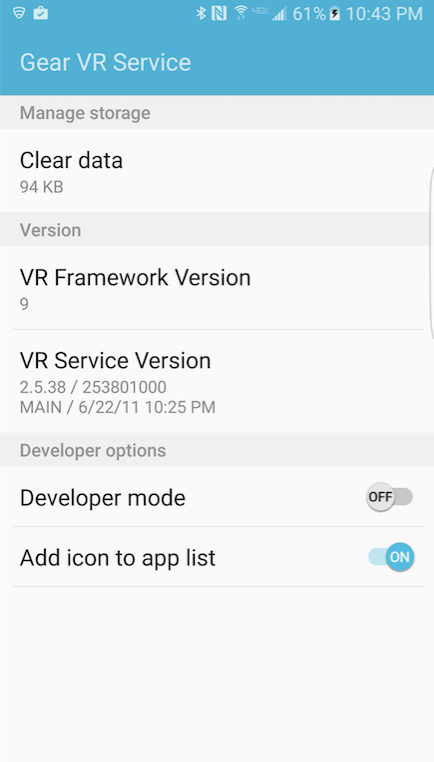
- Tap on the Add Icon to app list. This will add an icon at the phone’s app list (where you find all your other apps)
- Tap the icon from the apps list. The launching activity will list all your available VR apps. Find your app and tap on it. You’ll get a screen instructing you to insert the phone into the GearVR. Inserting it will launch your app 🙌
